OpenDaylight Controller runs in a JVM. Being a Java application, it can potentially run on any operating system that supports Java. However, for best results we recommend the following:
- A recent Linux distribution
- Java Virtual Machine 1.7
Note: The following instructions assumes:
- You are installing OpenDaylight Controller on your local Linux machine
- You will use the Mininet VM to create a virtual network
OpenDaylight Controller has not been tested in other environments.
Contents
| Table of Contents | ||
|---|---|---|
|
Installing OpenDaylight Controller
NOTE The following instructions are for running/installing the helium and earlier release. Please see (link) for more details.
There are two options for obtaining the OpenDaylight Controller code. Option #1 is the easiest for beginners to download the prebuilt current build. Option #2 is more advanced by building the modules on your machine.
Option #1 (Beginner)
Download the latest build of controller already built to have running in a couple of steps:
Download and extract the OpenDaylight Controller zip file (latest OpenDaylight Controller build).Prerequisite: JVM 1.7+ (JAVA_HOME should be set to environment)The Java JDK can be download here.
Download and Run the controller
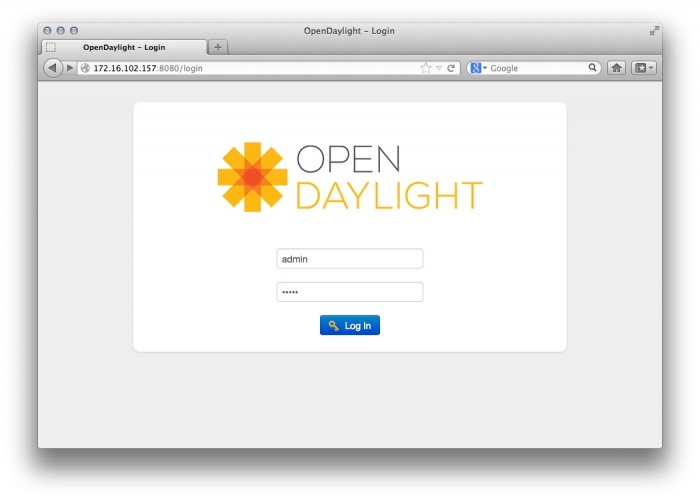
The source code of the OpenDaylight Controller is in a directory called opendaylight. In this directory (the coresponding directory in the git repository is usually the distribution/opendaylight/target/distribution.opendaylight-0.1.6-SNAPSHOT-osgipackage/opendaylight), you will see the following files:run.sh — launches the OpenDaylight Controller on Linux/Unix systemsrun.bat — launches OpenDaylight Controller on Windows systemsversion.properties — indicates the build versionconfiguration — basic initialization files (internal to OpenDaylight Controller)lib — Java librariesplugins — OpenDaylight Controller's OSGi plugins2. Enter ./run.sh or ./run.bat with administrator privileges to launch the OpenDaylight Controller application.3. Navigate to http://controller-ip:8080 to open the web interface, then use the following credentials to log in:User: adminPassword: admin4. Once logged in, please ensure to change the default admin password. To do so, navigate to the admin menu in the top right corner of the web interface. Select Users and then select the admin user. A pop-up will then present the option to Change Password.
Option #2 (Advanced)
If you wish to build the controller from source, please see the developer section in Pulling, Hacking, and Pushing the Code from the CLI. However, the following instructions are for the stable/helium git branch.
Troubleshooting
1. Out of memory error - java.lang.OutOfMemoryError: PermGen space[edit]
Can be resolved by setting maven options:
Increase the amount of memory by changing the "MAVEN_OPTS" ENV variable. An example for a Bash shell is as follows:
export MAVEN_OPTS="-Xmx1024m -XX:MaxPermSize=512m"
/* syntax for setting varies on the OS used by the build machine. */
You can verify the variable is set with the following in a Bash shell.
$ export | grep MAVEN_OPTS
declare -x MAVEN_OPTS="-Xmx1024m -XX:MaxPermSize=512m"
An example on a Linux based machine or a Mac you simply put "export" before the variable. e.g. export MAVEN_OPTS="-Xmx1024m -XX:MaxPermSize=512m" (parentheses around the value after the equals sign). That ENV variable is not persistent unless you put it into a shell startup script. In Linux for example the ~/.bashrc file and Mac the ~/.bash_profile file.
2. Maven out of memory error when building northbound integration tests
If you receive a Maven error when building northbound integration tests that will also state "java.lang.OutOfMemoryError: PermGen space:" you can skip building those tests running the following:
mvn clean install -DskipTests
/* instead of "mvn clean install" */
3. GetLocalHost() failure on MacOS and java7u5
If you see the following message when running the controller you have stumbled on a Java bug for MacOS:
"Failed to get local hostname java.net.UnknownHostException: repenno-mac: repenno-mac: nodename nor servname provided, or not known"
This is a known bug that has plagued Java for Macos for some time. For reference:
http://bugs.java.com/bugdatabase/view_bug.do?bug_id=7180557
http://blog.leon-rosenberg.net/2012/08/oracle-kills-getlocalhost-on-macos-x-in.html
First try adding an extra line to edit /etc/hosts like:
127.0.0.1 <your-host-name>But in some systems this is not enough. The <your-host-name> needs to be the same you get as the output of scutil.
For example, a good output of scutil assuming the host name is <sailing-mac> is:
sailing-mac:controller repenno$ scutil --get LocalHostName
sailing-mac
sailing-mac:controller repenno$ scutil --get HostName
sailing-mac
sailing-mac:controller repenno$ scutil --get ComputerName
sailing-mac
So, make sure all have the same name:
sailing-mac:controller repenno$ scutil --set LocalHostName <your-host-name>
sailing-mac:controller repenno$ scutil --set HostName <yout-host-name>
sailing-mac:controller repenno$ scutil --set ComputerName <your-host-name>
4. Out of Memory Error: java.lang.OutOfMemoryError: Java heap space[edit]
Increase the amount of Heap space at start up:
./run.sh -Xmx1024m
./run.sh -Xmx512m also works but the startup sequence is noticeably significantly slower. In some systems ./run.sh -Xmx256m it not enough.
Using Mininet
- Download Mininet. OpenDaylight Controller has been tested against the Mininet VM (Option 1). It has not been tested against other Mininet installation options.
- Launch the Mininet VM with VirtualBox or another virtualization application.
- Log on to the Mininet VM with the following credentials:
- user: mininet
- password: mininet
- Determine the IP address of the server hosting OpenDaylight Controller, and use it to start a virtual network: sudo mn --controller=remote,ip=controller-ip --topo tree,3.
Mininet will connect to OpenDaylight Controller and set up a three-level tree topology.
mininet@mininet-vm:~$ sudo mn --controller=remote,ip=172.16.102.161 --topo tree,3
*** Creating network
*** Adding controller
*** Adding hosts:
h1 h2 h3 h4 h5 h6 h7 h8
*** Adding switches:
s1 s2 s3 s4 s5 s6 s7
*** Adding links:
(h1, s3) (h2, s3) (h3, s4) (h4, s4) (h5, s6) (h6, s6) (h7, s7) (h8, s7) (s1, s2) (s1, s5) (s2, s3) (s2, s4) (s5, s6) (s5, s7)
*** Configuring hosts
h1 h2 h3 h4 h5 h6 h7 h8
*** Starting controller
*** Starting 7 switches
s1 s2 s3 s4 s5 s6 s7
*** Starting CLI:
mininet>
Note: See the Mininet Walkthrough for a more detailed explanation of Mininet's configuration options. There is an appendix that explains how to configure Mininet to use a remote controller.
Important troubleshooting - if you are running VirtualBox on the same host/desktop where the controller is running, and trying to start the virtual network on Mininet VM produces this error: "Unable to contact the remote controller at ...", then the following resolves the problem:
1. In VirtualBox, go to File-Preferences-Network and make sure you have at least one interface defined as Host-Only. Lets say its name is vboxnet0
2. In VirtualBox - Mininet Vm - Settings - Network, check that the adapter is of type Host only , and is connected to the interface from item 1 (vboxnet0)
3. On your host where controller and VirtualBox run, do "ifconfig" command to display all network interfaces on the machine.
Search for the interface as in item 1 (vboxnet0 in our example) Take the ip address specified there (most probably 192.168.56.1 - default), and that is the correct remote controller ip address to use when starting a virtual network in mininet vm as stated in the example above (--controller=remote,ip=192.168.56.1) .
4. If you are still not able to connect, you might want to consider temporarily disabling firewall on the host running the controller (on Linux, for example, iptables -F will do the job)
5. Sometimes, the way you start the mininet is a problem, it does not give error, but does not connect to the remote server. Here is a wrong example:
sudo mn --topo=tree,3 --mac --switch=ovsk --controller=remote, ip=192.168.16.10
Here is the correct example:
sudo mn --topo=tree,3 --mac --switch=ovsk --controller=remote,ip=192.168.16.10
The difference is the "SPACE" between "remote," and "ip".
Resetting Mininet
Here's a perl from the appendix mentioned above:
If Mininet crashes or if you lose your console from a remote connection, the switches remain configured in the database and you'll want to clean them up.
$ sudo mn -c
Using the Simple Forwarding Application
The OpenDaylight Controller includes an application called Simple Forwarding that lets you use the basic services for making forwarding decisions and install flows across all devices on the Openflow network. This application discovers the presence of a host via ARP message and installs dest-only /32 entries across all switches in the network, with the corresponding output ports toward the host.
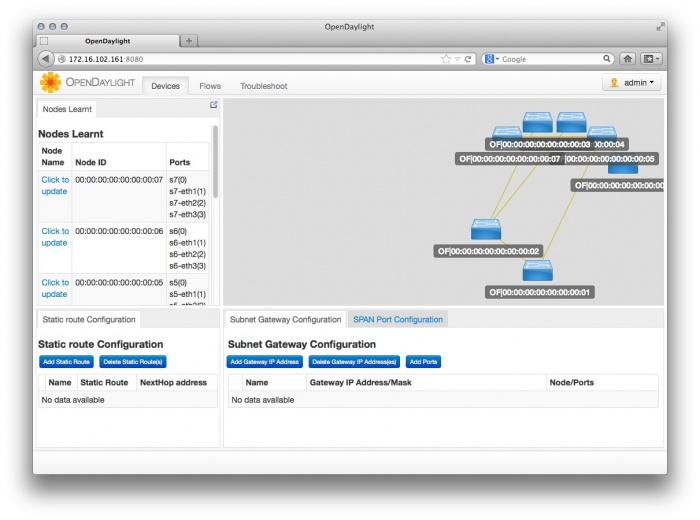
1. With OpenDaylight Controller and Mininet running as described in previous sections, log into the web interface.
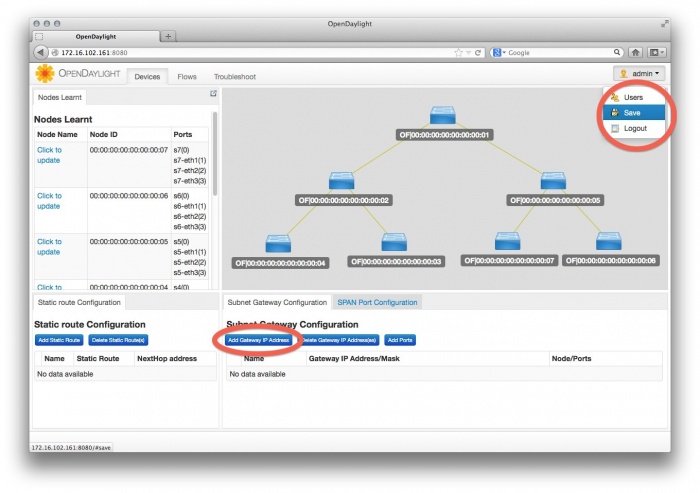
2. Drag and drop devices to organize the topology into its logical arrangement, then save the configuration.
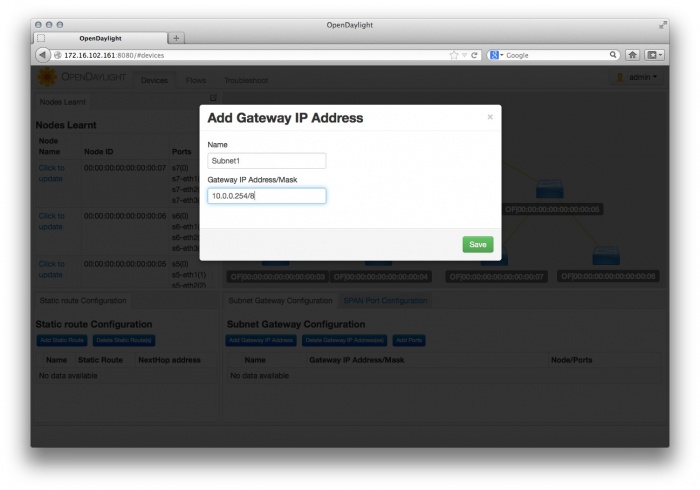
3. Click the Add Gateway IP Address button (shown above) and add the IP and subnet of 10.0.0.254/8
4 Confirm that hosts are now reachable from one another. On the console where Mininet is running, have one host ping another.
mininet> h1 ping h7
PING 10.0.0.7 (10.0.0.7) 56(84) bytes of data.
64 bytes from 10.0.0.7: icmp_req=1 ttl=64 time=1.52 ms
64 bytes from 10.0.0.7: icmp_req=2 ttl=64 time=0.054 ms
64 bytes from 10.0.0.7: icmp_req=3 ttl=64 time=0.060 ms
64 bytes from 10.0.0.7: icmp_req=4 ttl=64 time=0.052 ms
--- 10.0.0.7 ping statistics ---
4 packets transmitted, 4 received, 0% packet loss, time 2999ms
rtt min/avg/max/mdev = 0.052/0.422/1.523/0.635 ms
mininet>
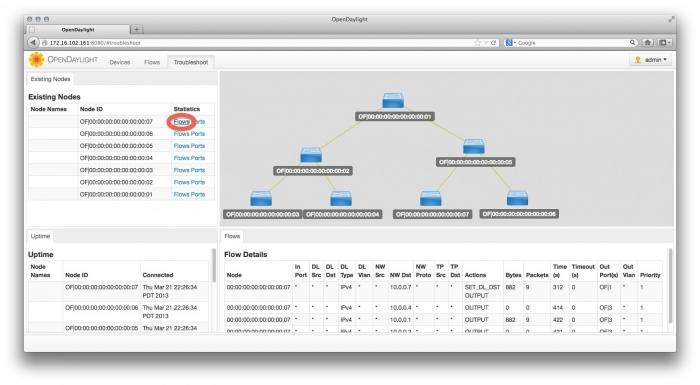
5. Click the Troubleshooting tab and then load the Flow Details for one of the switches.
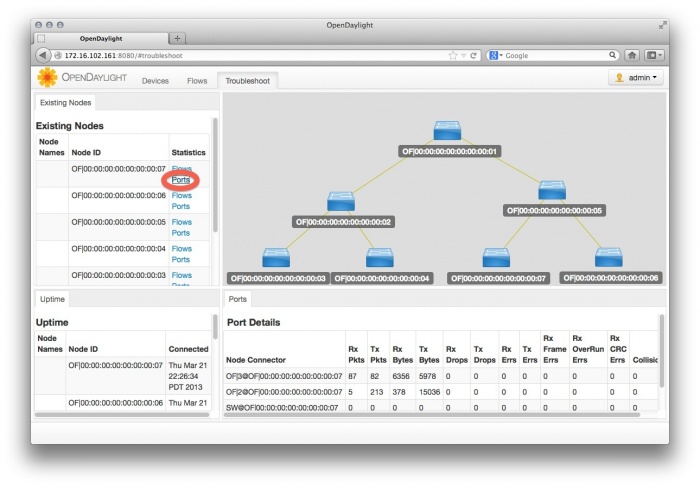
6. View the Port Details.
7. On the OSGI console, type ss simple. You will see that the Simple Forwarding app is ACTIVE.
osgi> ss simple
"Framework is launched."


id	State       Bundle
45	ACTIVE      org.opendaylight.controller.samples.simpleforwarding_0.4.0.SNAPSHOT
